• Home
  • Tesla Mods
  • Product Reviews
  • DIY Projects
Saturday, May 17, 2025
  • Login
No Result
View All Result
NEWSLETTER
SemoTech News
44 °f
weather
43 ° Sun
33 ° Mon
34 ° Tue
37 ° Wed
  • Home
  • Tesla Mods
    • All
    • Electrical
    • External
    • Internal
    12v Distributed Switched Power

    12v Distributed Switched Power

    Suma Performance Convex Mirrors

    Suma Performance Convex Mirrors

    Aero Covers and Wheels

    Aero Covers and Wheels

    Lightweight Porsche Aluminum Car Jack for Tesla

    Lightweight Porsche Aluminum Car Jack for Tesla

    Carbon Fiber Vinyl Wraps & 3 Aluminum Pedals

    Carbon Fiber Vinyl Wraps & 3 Aluminum Pedals

    Under Console LED Lighting Upgrade

    Under Console LED Lighting Upgrade

    Window Tinting

    Window Tinting

    PPF – Why you should Wrap your Tesla

    PPF – Why you should Wrap your Tesla

    Mirror-Mount Radar Detector & Camera

    Automated & Wireless Sentry Mode & Camera Video Upload

    Center Console Power Routing/Upgrade – Back to Front

    Trending Tags

    • Product Reviews

      Meross HomeKit Smart Air Purifier

      Trending Tags

      • DIY Projects
        • All
        • Electronics
        • Pool Automation
        Smart Wet Switch to Dry Contact Conversion

        Smart Wet Switch to Dry Contact Conversion

        Vertiv GXT5 UPS Quiet Fan Replacement Mod

        Pool Automation for Apple HomeKit (Siri) – Upgraded with External WiFi Antenna!

        Trending Tags

        • Home
        • Tesla Mods
          • All
          • Electrical
          • External
          • Internal
          12v Distributed Switched Power

          12v Distributed Switched Power

          Suma Performance Convex Mirrors

          Suma Performance Convex Mirrors

          Aero Covers and Wheels

          Aero Covers and Wheels

          Lightweight Porsche Aluminum Car Jack for Tesla

          Lightweight Porsche Aluminum Car Jack for Tesla

          Carbon Fiber Vinyl Wraps & 3 Aluminum Pedals

          Carbon Fiber Vinyl Wraps & 3 Aluminum Pedals

          Under Console LED Lighting Upgrade

          Under Console LED Lighting Upgrade

          Window Tinting

          Window Tinting

          PPF – Why you should Wrap your Tesla

          PPF – Why you should Wrap your Tesla

          Mirror-Mount Radar Detector & Camera

          Automated & Wireless Sentry Mode & Camera Video Upload

          Center Console Power Routing/Upgrade – Back to Front

          Trending Tags

          • Product Reviews

            Meross HomeKit Smart Air Purifier

            Trending Tags

            • DIY Projects
              • All
              • Electronics
              • Pool Automation
              Smart Wet Switch to Dry Contact Conversion

              Smart Wet Switch to Dry Contact Conversion

              Vertiv GXT5 UPS Quiet Fan Replacement Mod

              Pool Automation for Apple HomeKit (Siri) – Upgraded with External WiFi Antenna!

              Trending Tags

              No Result
              View All Result
              SemoTech News
              No Result
              View All Result

              Under Console LED Lighting Upgrade

              Victory has a thousand fathers, but defeat is an orphan.

              by SemoTech News Admin
              12/17/2019
              in Electrical, Internal, Tesla Mods
              0
              Under Console LED Lighting Upgrade

              The TM3 cabin LED lighting is dim, and while you can buy some LED upgrades (I will cover that in another post) some areas like the lights in the headliner cannot be currently upgraded due to their direct solid-state solder construction.

              If you want to access the front cubby of the center console at night there is a small rectangular LED inside, however it is useless if you have added an aftermarket tray (another great accessory – see some versions HERE, HERE and HERE) 

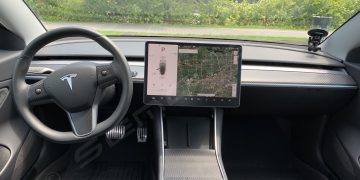
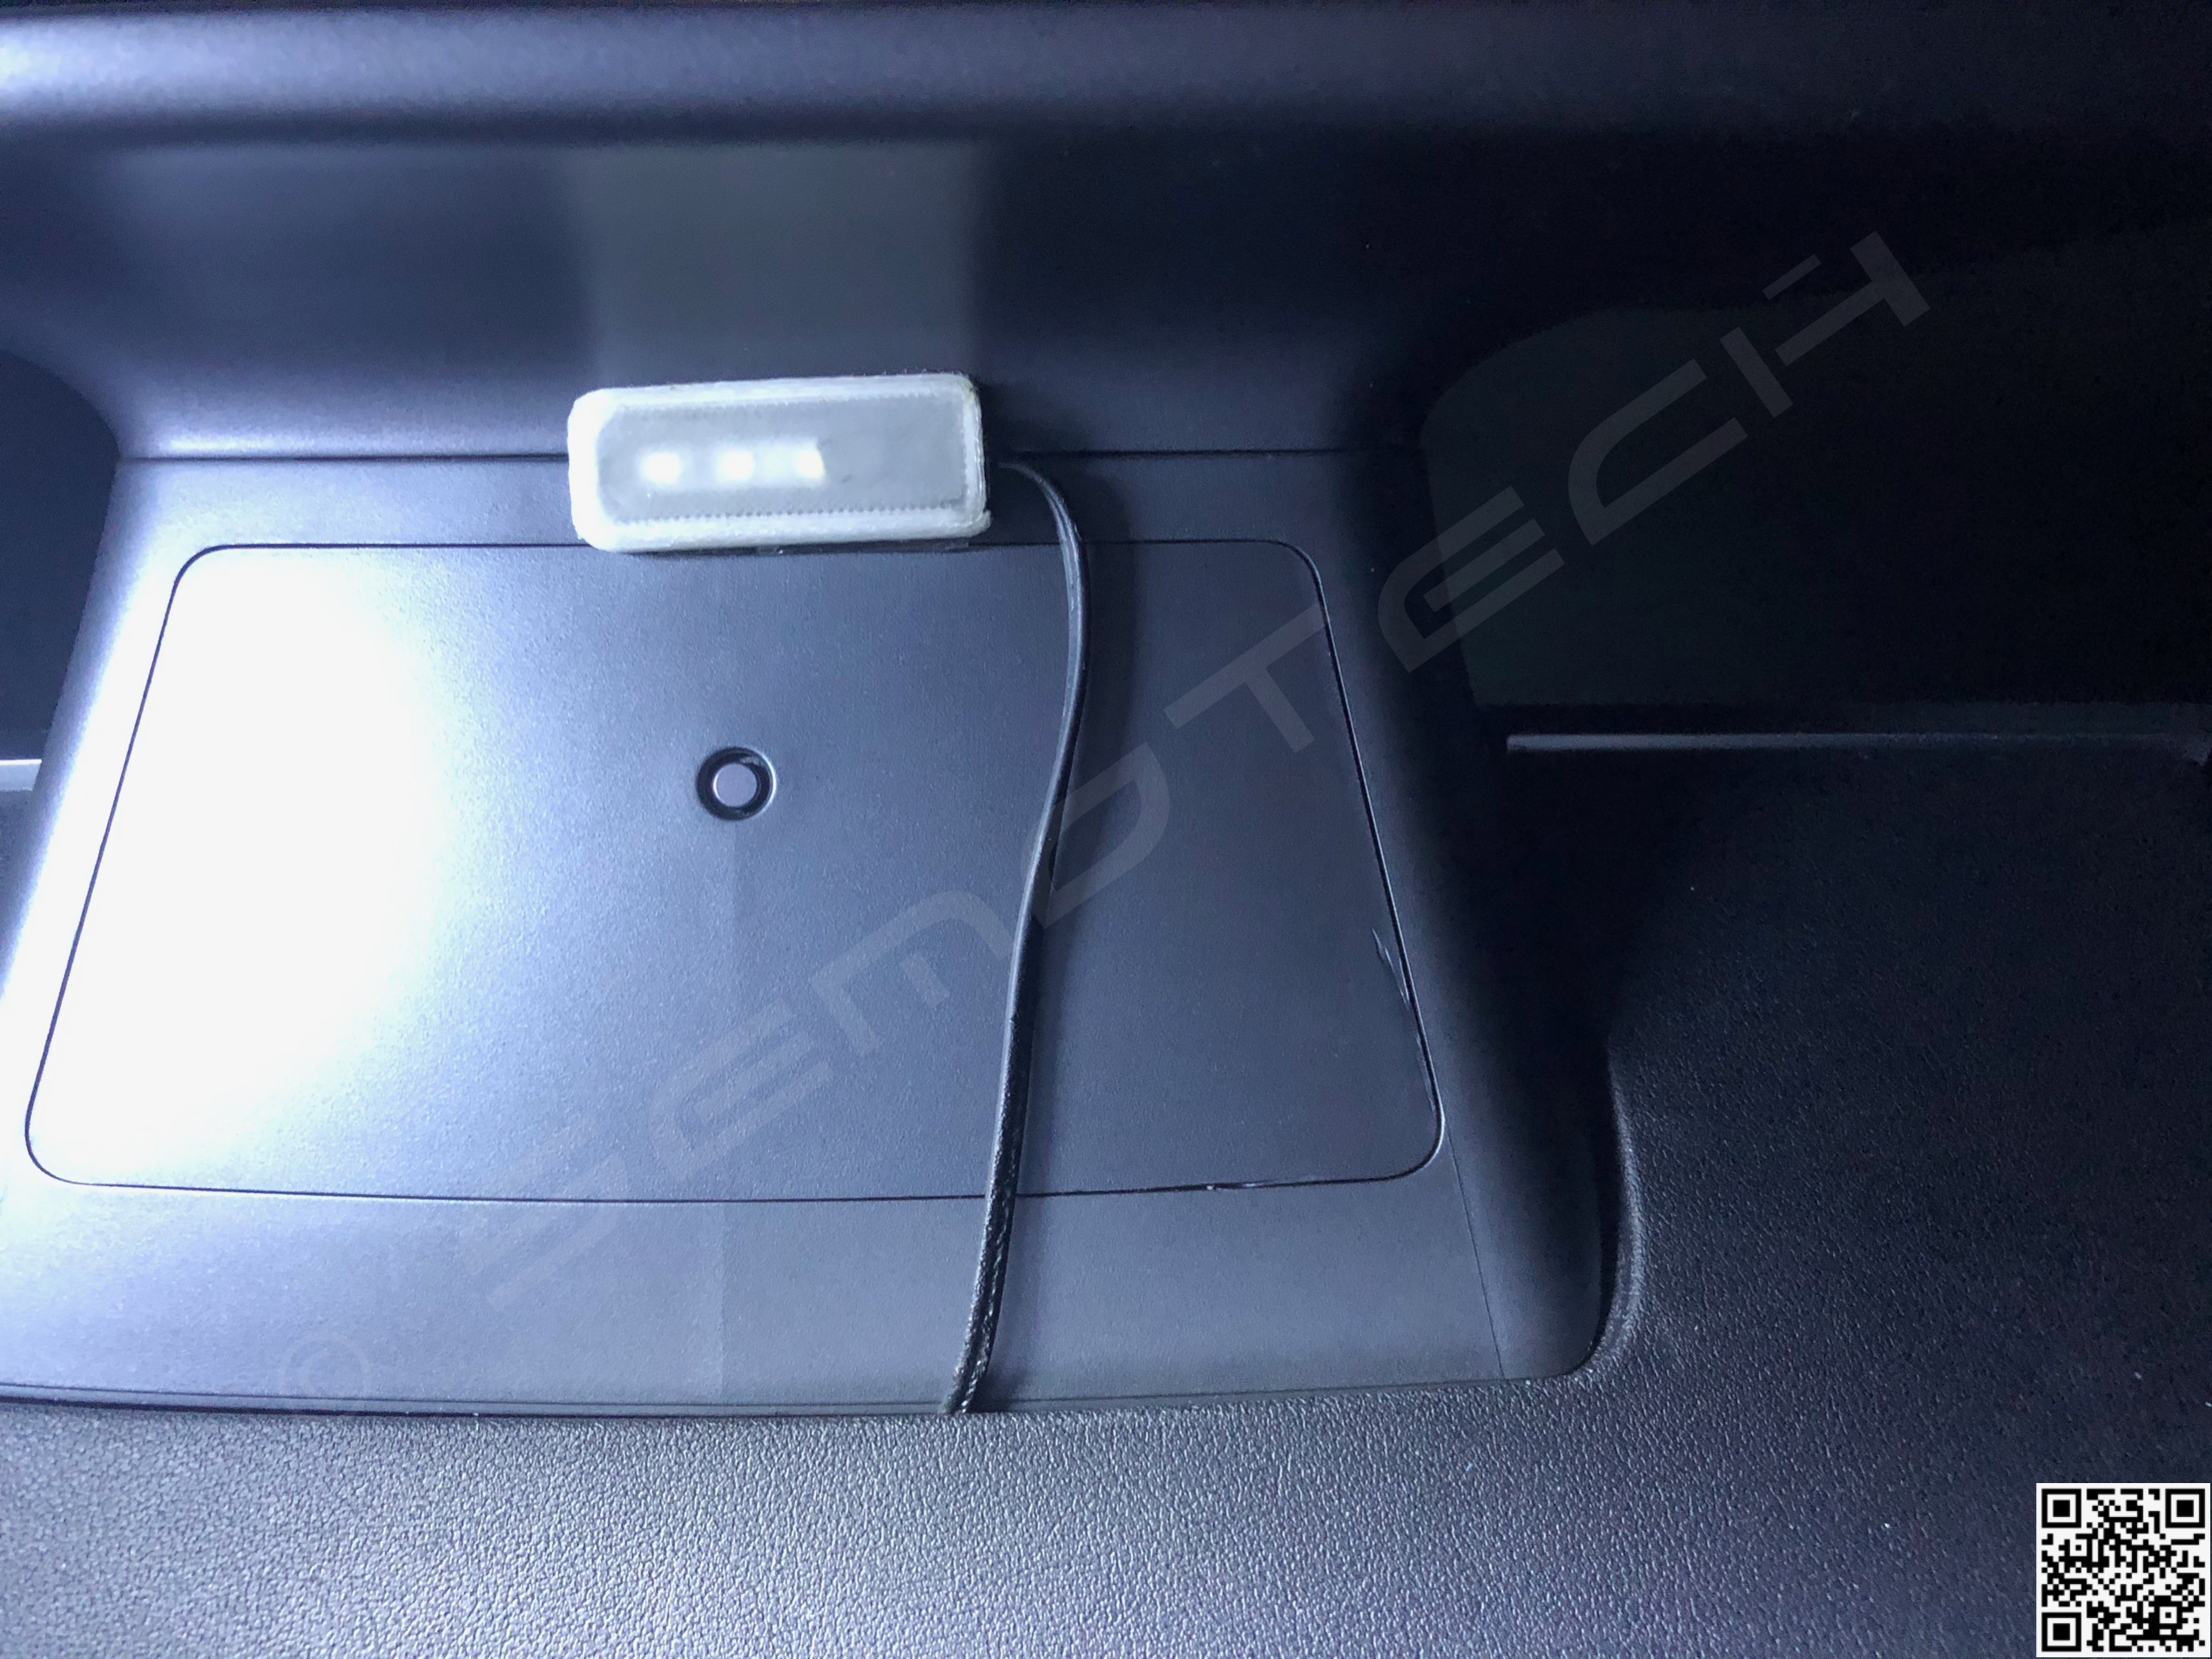
              A nice and hidden front console lighting solution is to install a small LED strip (3 LED’s) on the underside of the center screen!

              You can find instructions and parts list if you want to build the solution yourself from HERE or buy a pre-made cable, LED, cable and connector from the same site HERE <- Easier but it may take a while to get it.

              If you want to build your own LED bar, without wire tapping and making this a fully removable mod, here is the connectors parts list:

              A) Female Connector (car uses this) – TE Connectivity / AMP  P/N: 1534111-1
              B) Male Connector (LED’s use this) – TE Connectivity / AMP  P/N:  1-1534155-1
              AB) Retainer / Cover for Connectors (each connector needs one) – TE Connectivity / AMP  P/N:  1534027-1
              C) Pin Connectors (2 per plug) – TE Connectivity / AMP  P/N:   1-928918-1 (Cut Strip)

              Parts count for TM3 Console LED power splitter:

              2 x “A”
              1 x “B”
              3 x “AB”
              6 x “C”

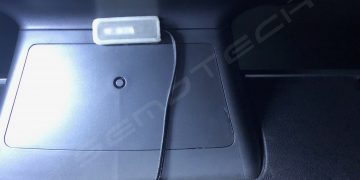
              The most challenging part of this mod will be to route the LED power cable under the cover of the temperature sensor (small round dot under the console), and back to the right-side of the console after removing the passenger side plastic and silver trim pieces that are held by clips and a series of T20 screws. There are plenty of YouTube Videos for taking the Center Console trim apart.

              Once you manage to snake/route the power connector and cable for the under-display LED to the right-side of the console, you have 2 options:

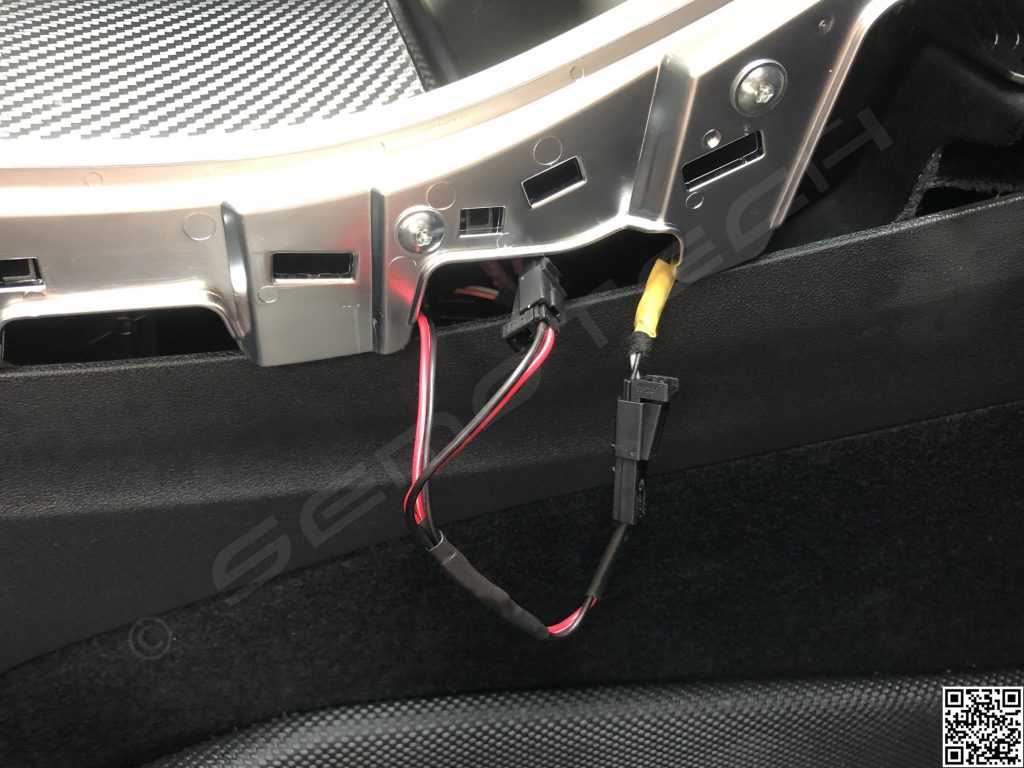
              A – Disconnect the yellow jacket power cable, the one coming from the front of the console, and thus deactivate the OEM Led inside the cubby, and connect just the new LED connector.

                  OR

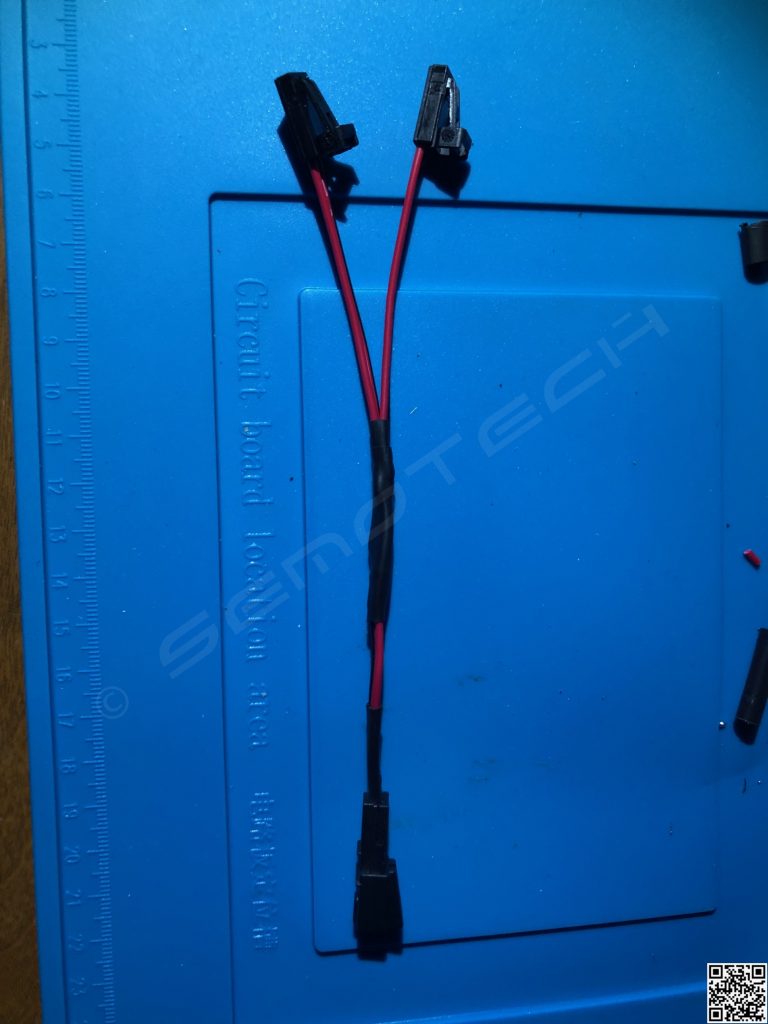
              B – Split the car power to connect both the new and OEM LED’s. You can simply buy $10 LED extension cables and make your own splitter, like I did.

              Now the LED(s) will come on only when you open the middle cover in the console, and the light is bright and focused.

              Here is a video of the result: [MEDIA=youtube]05gVp46qm4k[/MEDIA] 

              PICTURES:

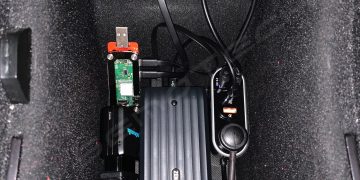
              Build a power splitter from the $10 kit linked above.

              Remove the Passenger Molding (just pull on it)

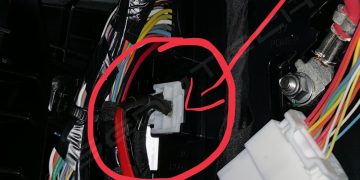
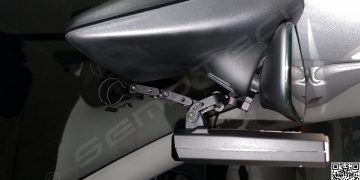
              Access the side power cable for the front console cubby light underneath and insert the splitter inline.

              Route the LED light cable on the side of the console and up to the back-side of the center screen mount

              If all was done correctly, opening the center console lid will activate BOTH the built-in LED and the Under Console LED!

              Tags: tesla model 3
              SemoTech News Admin

              SemoTech News Admin

              Next Post
              Carbon Fiber Vinyl Wraps & 3 Aluminum Pedals

              Carbon Fiber Vinyl Wraps & 3 Aluminum Pedals

              Please login to join discussion

              Category

              • DIY Projects
              • Electrical
              • Electronics
              • External
              • Internal
              • Pool Automation
              • Product Reviews
              • Tesla Mods

              Site Links

              • Log in
              • Entries feed
              • Comments feed
              • WordPress.org
              • About
              • Advertise
              • Contact

              © 2023 SemoTech News - Latest News from SemoTech.

              No Result
              View All Result
              • Home
              • Tesla Mods
                • External
                • Electrical
                • Upgrades
                • Internal
              • DIY Projects

              © 2023 SemoTech News - Latest News from SemoTech.

              Welcome Back!

              Login to your account below

              Forgotten Password?

              Retrieve your password

              Please enter your username or email address to reset your password.

              Log In