All Tesla’s have an array of cameras that allow for amazing functionality, safety and security. Starting with Software Version 9, Tesla has added Sentry Mode and the ability to download video from the cameras to a USB drive (properly formatted with FAT32 or EXT4 and labeled “TeslaCam”). While this is great and a welcome addition to the ever evolving functionality of the Tesla cars, it is a bit buggy. The USB drive ends up getting corrupted due to power cutting before recordings compete or during manual removal. Even with a perfect operational record it is inconvenient to have to deactivate recordings, remove the USB drive, take it to your computer, copy the videos to review them and then put it back. Several “workarounds” have appeared using new mobile apps that connect to special USB drives that are Wi-Fi enabled. They do allow you to review the video easier, but the drawback is that these USB drives are also prone to corruption, there is no backup to the data, and the upload to a home computer is still a manual process.
Enter the automated, self-healing, self uploading Mod!
Here are some features:
- Self-Healing at startup (File System will automatically repair itself)
- Self-Connecting via Wi-Fi to a home computer when in proximity
- Auto-Upload of “Saved” videos to the home computer
- Notifications sent to mobile phone
- Runs open-source software
- Fully self-contained with low-power utilization
- Can be expanded easily with the use of microSD cards
- MicroSD cards are more reliable than USB sticks/drives
- Can be connected to both the car for Data and an external Battery pack for backup power
OK, so what is this little miracle?
Well, the magic is a combination of the amazing $10 Rasdberry Pi micro-computer and custom software.
Here is the Parts List:
A) Raspberry Pi Zero W – only $10 – HERE
B) Heatsink Case – only $7 – HERE
C) High endurance microSD card – only $17 – HERE
D) A short USB-A to Micro USB Cable – only $5 – HERE
E) Optional (recommended) Power Bank w/ Passthrough Charging – HERE (this model is ideal if you have not implemented PART 7 above and have not installed additional USB power in the front of the console. This Zendure Power Bank has a built-in USB hub as well)
F) Optional (recommended) Short USB-C to USB-A for the Zendure Power Bank – HERE
G) A home NAS device (Network Attached Storage – Like a Synology, Q-Nap, etc), or a computer you keep on all the time and have a fair amount of disk space available.
While you wait for the parts to arrive, configure your computer or NAS with a network share accessible from your home wireless, and setup a username and password. Save these and the IP address of the NAS, as you’ll need them later.
Once you have all the parts, assemble the Pi in the case, and begin setting up the microSD card by following the tutorial on THIS page and download the LATEST release of the software for the Raspberry Pi. The software will make it a virtual single or dual USB drive (Video and Music or just Video). If you encounter any issues with this process, go HERE to ask for help.
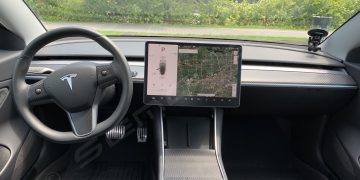
With the software loaded, confirm the VIDEO and MUSIC shares on your computer, and then connect the Raspberry Pi to one of the Tesla front USB ports. The other microUSB connector can be connected to the Power Bank if you got it.
You should now see the recording indicator in the top right of the center screen, which means it’s ready to go. Next time you pul into your driveway or come close to your home WiFi all the saved videos will be automatically uploaded. If you have the power bank that process will ensure completion even if you exit the car and power stops.
Once confirmed working you’ll never have to remove it or worry about it again!
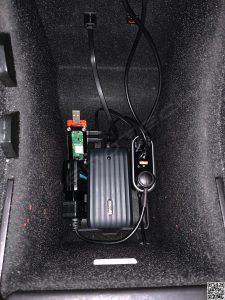
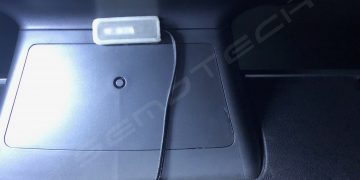
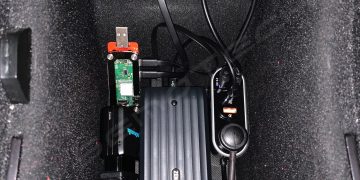
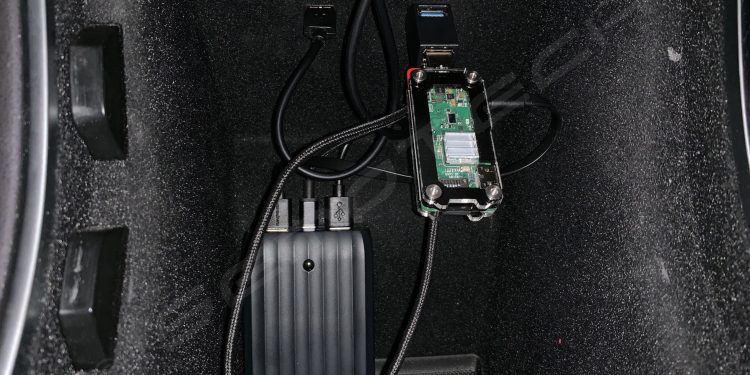
Here is a picture of my setup:
(You can see the Raspberry Pi on the left side, and the Zendure Power bank in the middle – My setup also uses the extended power mod from Part 7 above)
